After unlocking the bootloader and surviving Xiaomi’s 168-hour trial of patience, I wasn’t about to stop there. The next step? Root access.
I wanted full control. I wanted to say goodbye to system apps I’ll never use and hello to advanced tools that actually do something. So yeah, rooting was the natural next step.
Preparation
- I had already backed up my full ROM.
- I uploaded the
recovery.imgto the Hovatek TWRP Builder to generate a custom recovery. - I downloaded platform-tools (Fastboot tools) from this Hovatek thread.
- I placed the
recovery.imginside the platform-tools folder for convenience. - I entered Fastboot mode by holding Power + Volume Down and connecting the phone to my PC.
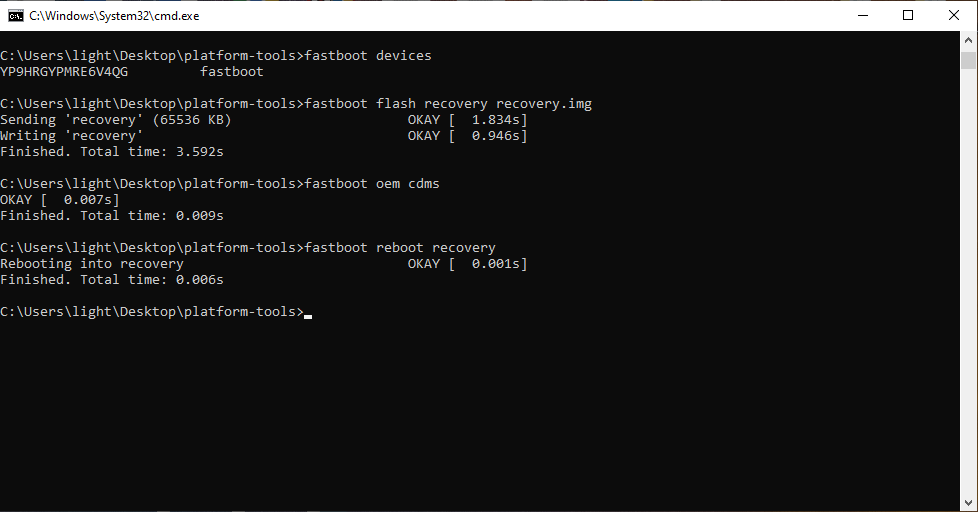
- I flashed the recovery image using Fastboot.
Switching Recovery (When TWRP Failed)
- The first custom recovery (TWRP) I flashed required additional tweaks
- I also tried PitchBlack Recovery from:
https://sourceforge.net/projects/wulan17/ - Flashed it via Fastboot.
- Rebooted into recovery

Optional: Wipe Data for Stability
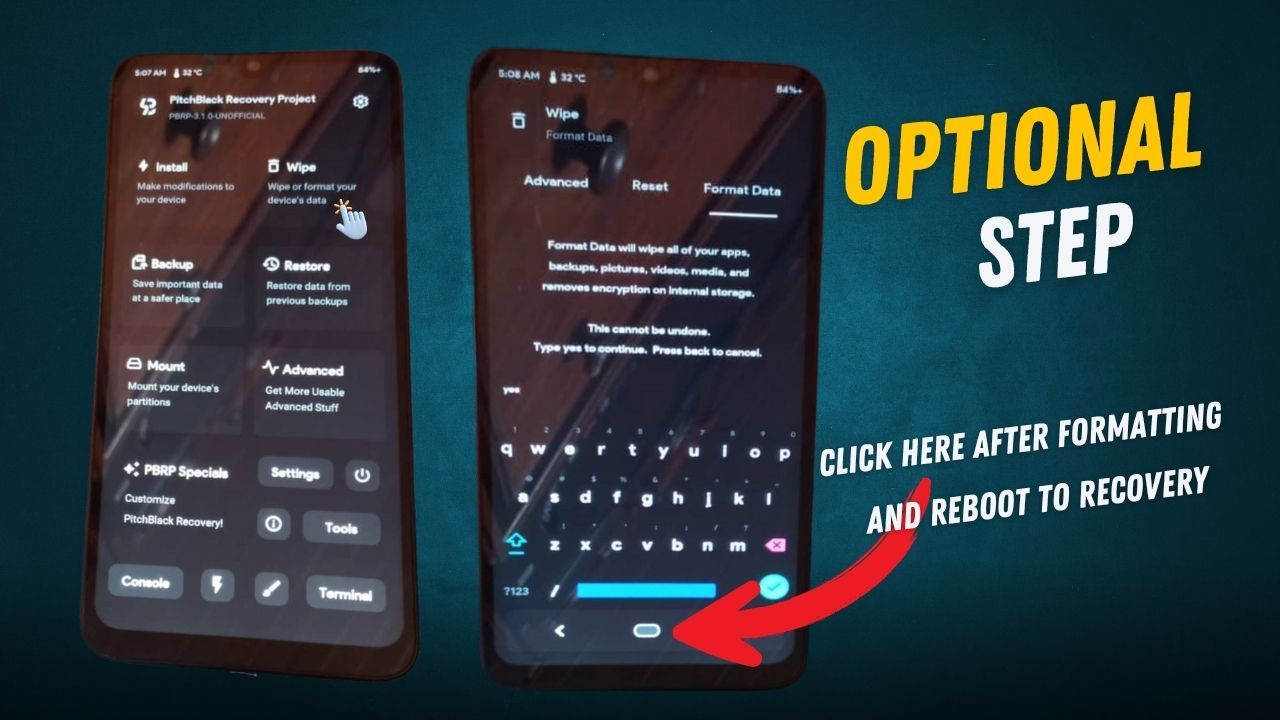
- Inside PitchBlack, I went to Wipe > Format Data and typed
yes. - This was to prevent common issues like bootloops or “0MB internal storage.”
- (⚠️ Skip this step unless you’ve backed up your data.)
- I rebooted back into recovery afterward.
Backing Up Critical Partitions
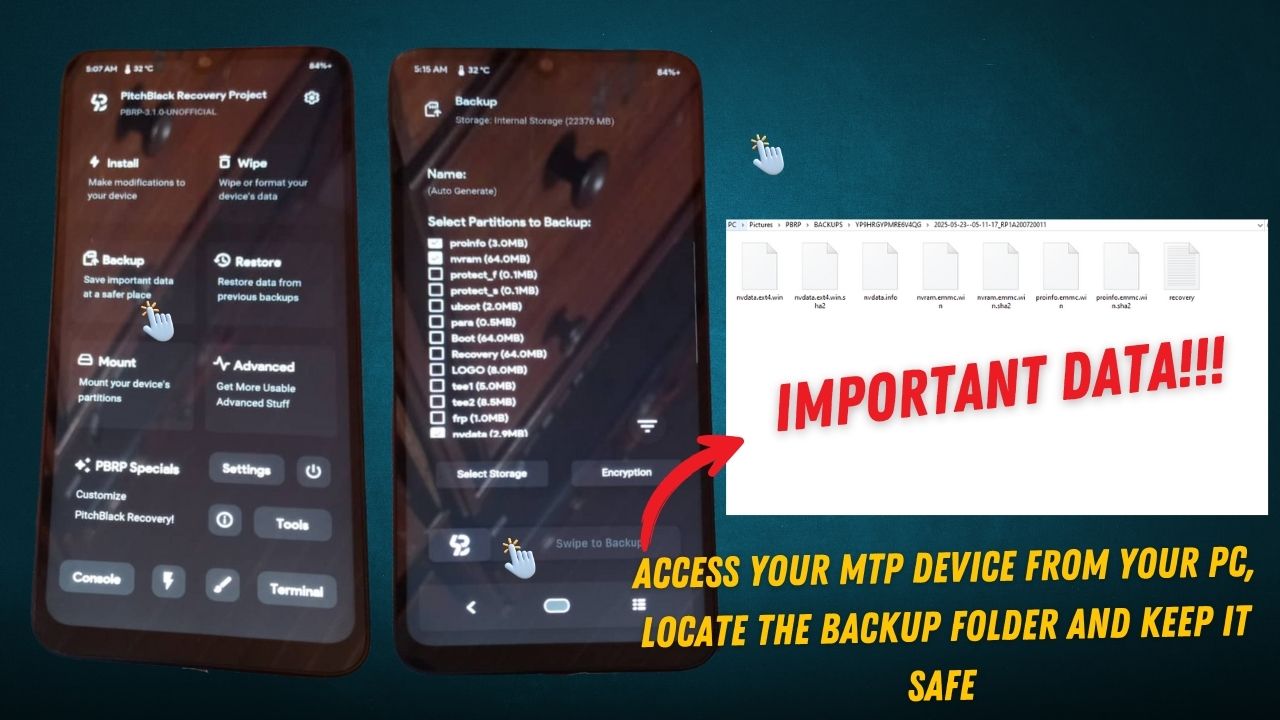
- While still in recovery, I backed up:
proinfonvramnvdata
- These are important for my phone’s identity and network functionality.
- The backups were saved in the PBRP folder on internal storage.
- My PC detected the phone in MTP mode, so I copied the backup folder to my computer for safekeeping.
Flashing Magisk
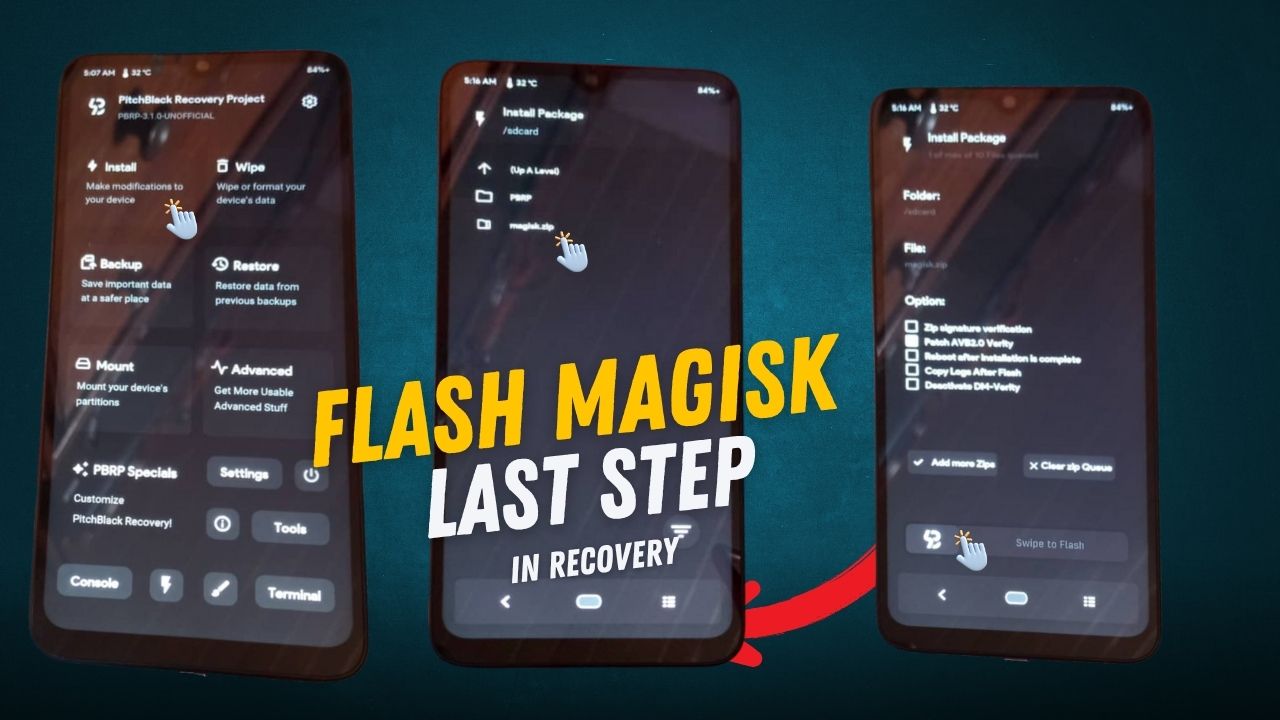
- The PitchBlack Recovery ZIP I downloaded actually included a Magisk ZIP file.
- I copied the Magisk ZIP to my phone’s internal storage.
- Still in recovery, I used PitchBlack to flash the Magisk ZIP.
- PitchBlack took care of patching AVB 2.0 verity automatically.
- I then rebooted the device into system.
Final Setup & Root Verification
- Once the system booted, I set up my phone normally.
- I downloaded the Magisk APK from https://github.com/topjohnwu/MagiskManager/releases .
- Magisk prompted to complete installation, which I allowed.
- I downloaded Root Checker from the Play Store to verify, root was successful.
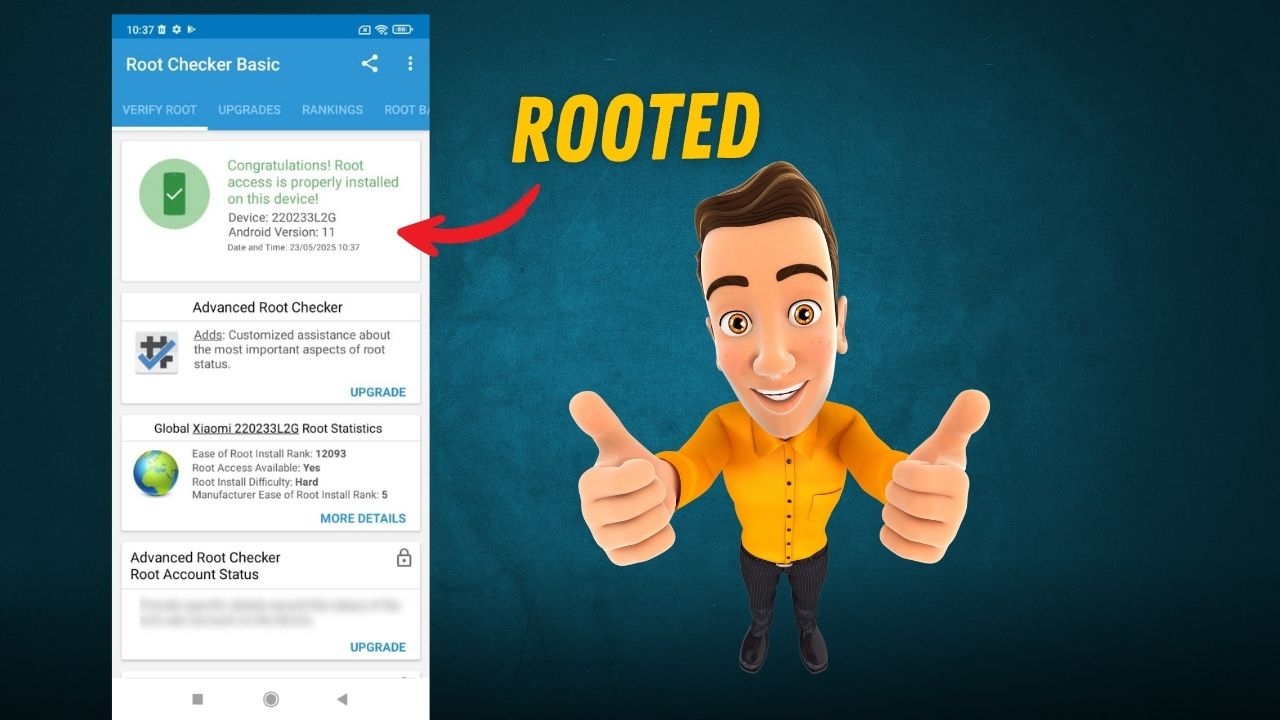
Final Thoughts
This wasn’t as hard as I thought it would be.
What made the difference:
- A clear mind
- Clear directions
- And the right tools
Once I had those, rooting my Redmi 10A became a much smoother process than expected.


It’s m first time
Hello please can you create a twrp recovery for my redmi 10a sports
My 6765 6gb 128gb
How to root itel awesome A50
Hi, Gilbert
Is this your first time trying to root a phone?
Yes